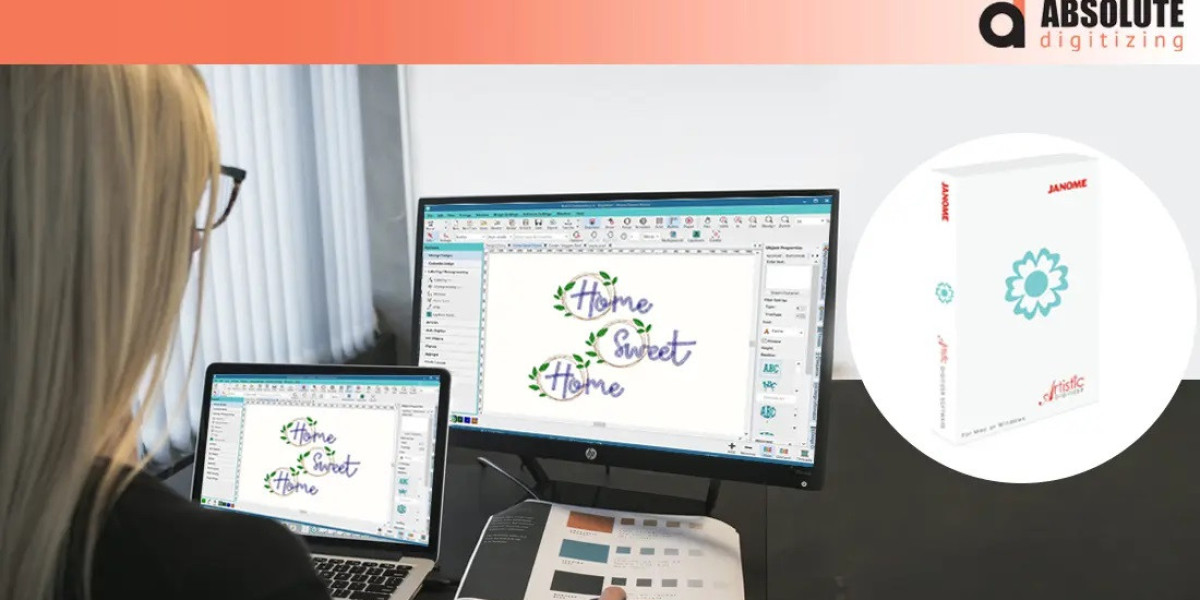

Janome Embroidery Digitizing Software: Complete Guide
Turning a logo, drawing, or name into embroidery can feel confusing at first. You see a beautiful image on your computer, but an embroidery machine sees something completely different: stitches, commands, colors, and movement.
That is why choosing the right Janome embroidery digitizing software matters. The software helps transform artwork into an embroidery design that a compatible machine can understand and stitch.
Whether you are a beginner learning machine embroidery or someone preparing logos for regular production, understanding the basics can help you avoid common mistakes and get better results.
In this guide, we will look at what Janome embroidery digitizing software does, how the digitizing process works, which features matter, how to prepare designs, and what to consider before creating a machine-ready embroidery file.
What Is Janome Embroidery Digitizing Software?
Janome embroidery digitizing software refers to software used to create, edit, prepare, or export embroidery designs for compatible Janome embroidery machines.
Instead of working with an image like a JPG or PNG alone, digitizing software lets you create embroidery objects and assign stitch information to them.
Depending on the software and workflow, you may be able to control:
Stitch types
Stitch direction
Stitch density
Underlay
Thread colors
Design size
Stitch sequence
Lettering
Hoop placement
Machine file output
Think of the software as a translator. Your artwork is the original language, while the embroidery file is the set of instructions your machine understands.
Why Do You Need Digitizing Software?
An ordinary image file does not contain the information required to operate an embroidery machine.
For example, a PNG can tell your computer that a particular area is blue. It cannot tell an embroidery machine how many stitches should be used to create that area or where those stitches should begin and end.
Digitizing software bridges that gap.
It helps turn artwork into an actual embroidery design by defining the stitch structure behind the image.
Key Features to Look For
Not every embroidery software package offers the same tools. If you are choosing software for Janome projects, focus on features that support the way you actually work.
1. Easy Artwork Import
A useful embroidery program should make it simple to bring artwork into the workspace.
You may start with:
JPG images
PNG graphics
Vector artwork
Scanned drawings
Existing embroidery files
Clean artwork is usually easier to digitize than a blurry or complicated image.
2. Stitch Type Selection
Different areas of a design require different stitch structures.
Satin Stitch
Satin stitching is commonly used for lettering, borders, and narrow shapes.
Fill Stitch
Fill stitches are useful for larger areas that need thread coverage.
Running Stitch
Running stitches are often suitable for outlines, fine details, and lightweight elements.
Being able to adjust these stitch types gives you more control over the final embroidery.
3. Stitch Density Controls
Stitch density determines how closely stitches are placed.
Too much density can create bulky embroidery, thread buildup, and fabric puckering. Too little density can leave gaps or allow the fabric to show through.
Good digitizing software gives you enough control to adjust density according to the design and material.
4. Underlay Settings
Underlay provides a foundation beneath the visible stitches.
It can help stabilize the fabric and support the top stitching. Different designs may need different underlay approaches.
This is particularly important when working with fabrics that move or stretch during stitching.
5. Lettering Tools
Text is one of the most common elements in embroidery.
Useful lettering features can help you:
Select suitable embroidery fonts
Adjust letter spacing
Change text size
Set alignment
Create curved lettering
Control stitch settings
Small lettering needs special care because thread cannot reproduce tiny details as easily as screen graphics.
6. Hoop and Design Management
Before stitching a design, you need to know whether it fits your embroidery hoop.
Good software should make it easy to view the design area and position artwork correctly.
Always check the actual hoop dimensions instead of assuming that every design will fit automatically.
Understanding Janome Embroidery File Formats
When working with Janome machines, file format compatibility is important.
A design may look perfect in software but still be unsuitable for your specific machine if it is exported incorrectly.
One commonly associated format is JEF, which is used for compatible Janome embroidery machines.
Depending on your machine and software workflow, you may also encounter other embroidery formats.
Before exporting a design, check your machine's documentation to confirm the required file type.
JEF and Digitized Designs
A JEF file contains embroidery instructions rather than ordinary image information.
It can include information such as:
Stitch locations
Thread colors
Stitch sequence
Needle commands
Design positioning
Trims and jumps
That is why you should not treat a JEF file like a regular picture file.
How to Digitize a Logo for a Janome Machine
Creating a machine embroidery design from a logo is one of the most useful applications of digitizing software.
Here is a simple workflow.
Step 1: Prepare the Artwork
Start with the cleanest logo available.
Remove unnecessary backgrounds and fix rough edges before beginning the digitizing process.
If your logo contains very small details, decide whether they need to be simplified.
Step 2: Set the Final Size
Determine how large the logo will actually be embroidered.
A small shirt logo may need a simpler stitch structure than a large jacket-back design.
The final size should be considered before digitizing, not after.
Step 3: Create Embroidery Objects
Break the artwork into individual sections.
For example, a logo might contain:
A background shape
An icon
An outline
Text
Decorative details
Each section can then be assigned an appropriate stitch type.
Step 4: Adjust Stitch Direction
Stitch direction affects the appearance of thread on fabric.
Changing the angle between suitable sections can add definition and prevent the design from looking flat.
Step 5: Apply Underlay and Density
Set the appropriate foundation stitches and density for each section.
Do not assume one setting works for the entire logo.
Fabric type, design size, and stitch type all influence the ideal settings.
Step 6: Set Thread Colors
Choose thread colors that closely represent the original artwork.
Remember that thread may appear different from colors displayed on a computer monitor.
Step 7: Plan the Stitch Sequence
Organize the design so the machine can sew it efficiently.
A good stitch sequence can reduce unnecessary jumps, trims, and color changes.
Step 8: Export and Test
Save the design in the appropriate machine format and run a test stitch.
A physical sample is one of the best ways to identify problems before production.
Automatic vs. Manual Digitizing
Some software can automatically convert artwork into embroidery objects.
This can be convenient, especially for beginners.
However, automatic digitizing does not always produce production-ready results.
It may create:
Too many stitches
Poor stitch directions
Excessive density
Unnecessary color changes
Weak small details
Poor stitch sequencing
Manual adjustments can often improve the final design significantly.
Automatic tools are useful as a starting point, but understanding embroidery principles remains important.
Choosing Software for Your Skill Level
The best software is not necessarily the one with the most features.
It is the one that matches your needs and experience.
For Beginners
Look for:
Simple navigation
Easy artwork import
Basic stitch tools
Clear previews
Straightforward file export
Helpful lettering features
You do not need to master every advanced function on day one.
For Experienced Users
Advanced users may want greater control over:
Stitch angles
Density
Underlay
Pull compensation
Object sequencing
Advanced lettering
Editing tools
Multiple hoop layouts
The more control you have, the more precisely you can fine-tune embroidery designs.
Common Digitizing Mistakes to Avoid
Using a Low-Quality Image
A blurry image makes it harder to identify clean shapes.
Whenever possible, begin with high-resolution artwork.
Making Tiny Details Too Small
A thin line that looks perfect on a monitor may disappear when stitched.
Simplification is often better than trying to preserve every pixel.
Ignoring Fabric
Embroidery settings should be chosen with the fabric in mind.
Cotton, denim, fleece, stretch garments, and caps can behave very differently under the needle.
Overloading the Design With Stitches
More stitches do not automatically mean better embroidery.
Excessive stitching can increase bulk and create fabric distortion.
Skipping the Test Stitch
Never assume a design will stitch perfectly just because the preview looks good.
A test sample gives you valuable information about density, registration, lettering, and overall appearance.
Tips for Better Janome Embroidery Designs
Use these practical tips as you learn:
Start with simple designs.
Use clean, high-quality artwork.
Decide the final embroidery size early.
Simplify very small details.
Match stitch types to individual shapes.
Adjust density according to fabric.
Use suitable underlay.
Keep stitch sequencing efficient.
Check hoop compatibility.
Always test important designs before production.
With practice, these steps become much more natural.
When Should You Hire a Professional Digitizer?
Learning Janome embroidery digitizing software can be rewarding, but not every project needs to be handled alone.
Professional digitizing can make sense when you are working with:
Business logos
Detailed artwork
Small lettering
Cap embroidery
Large production orders
Multiple fabric types
Designs requiring several machine formats
If you are spending hours correcting stitch problems, professional digitizing may actually save time and reduce material waste.
Janome Embroidery Digitizing Services From Absolute Digitizing
Absolute Digitizing helps turn artwork and logos into embroidery-ready designs with practical stitching requirements in mind.
The focus should not be simply making an image appear inside embroidery software. A successful design needs to sew properly on real fabric.
Professional digitizing can help with:
Custom logo embroidery
JEF embroidery designs
Small lettering
Hat and cap designs
Uniform embroidery
Complex artwork
Production-ready embroidery files
If you already have artwork, providing the original image, intended size, fabric type, and machine information can help create a more suitable embroidery design.
How to Improve Your Digitizing Skills
You do not have to learn everything at once.
Start by practicing simple shapes. Create circles, rectangles, outlines, and basic lettering. Then experiment with satin and fill stitches.
Next, learn how density and underlay affect different fabrics.
Finally, practice converting simple logos into complete embroidery designs.
Most importantly, stitch your work on real fabric. Screen previews can teach you a lot, but actual stitch-outs reveal details that software cannot fully predict.
Final Thoughts
Choosing and learning Janome embroidery digitizing software can open the door to creating custom machine embroidery designs from logos, artwork, names, and illustrations.
The software provides the tools, but good results come from understanding embroidery itself. Stitch type, density, underlay, direction, sequencing, fabric, and final size all matter.
Start with simple designs, practice regularly, and test your work before production. When a project is too detailed or important to risk, professional digitizing from Absolute Digitizing can help you move from digital artwork to cleaner, more dependable embroidery.
FAQs
1. What is Janome embroidery digitizing software used for?
It is used to create, edit, and prepare embroidery designs for compatible Janome machines. It can turn artwork into stitch-based designs and export supported embroidery file formats.
2. What file format does a Janome embroidery machine use?
JEF is a commonly associated embroidery format for compatible Janome machines. However, you should always check your specific machine's requirements before exporting.
3. Can I convert a JPG into a Janome embroidery file?
Yes, but the JPG needs to be digitized first. An image contains pixels, while an embroidery file contains stitch instructions that the machine can follow.
4. Is automatic embroidery digitizing good for beginners?
Automatic tools can be helpful for getting started, especially with simple artwork. However, manually reviewing and adjusting stitch settings is often necessary for better production results.
5. Does Absolute Digitizing provide Janome-compatible embroidery files?
Yes. Absolute Digitizing can prepare custom embroidery designs and JEF-compatible files based on your artwork, intended size, fabric, and project requirements.